Mastering Aptos Blockchain: Building Your First Smart Contract with Move Language

Blockchain Developer / Software Engineer with demonstrated excellent skills in building dApps & smart contracts for use on the Ethereum Virtual Machine and other compatible networks.
I build with Solidity | React | JavaScript | Laravel | PHP
I am sure you are already excited to build your first smart contract on the Aptos blockchain. Let's quickly get into action.
Aptos Wallet Installation and Setup
An Aptos wallet is needed to interact with decentralized applications on the Aptos blockchain, just like we have a MetaMask wallet for interacting with dApps on the Ethereum blockchain.
We will be installing and setting up Martian Wallet for this course using the following steps:
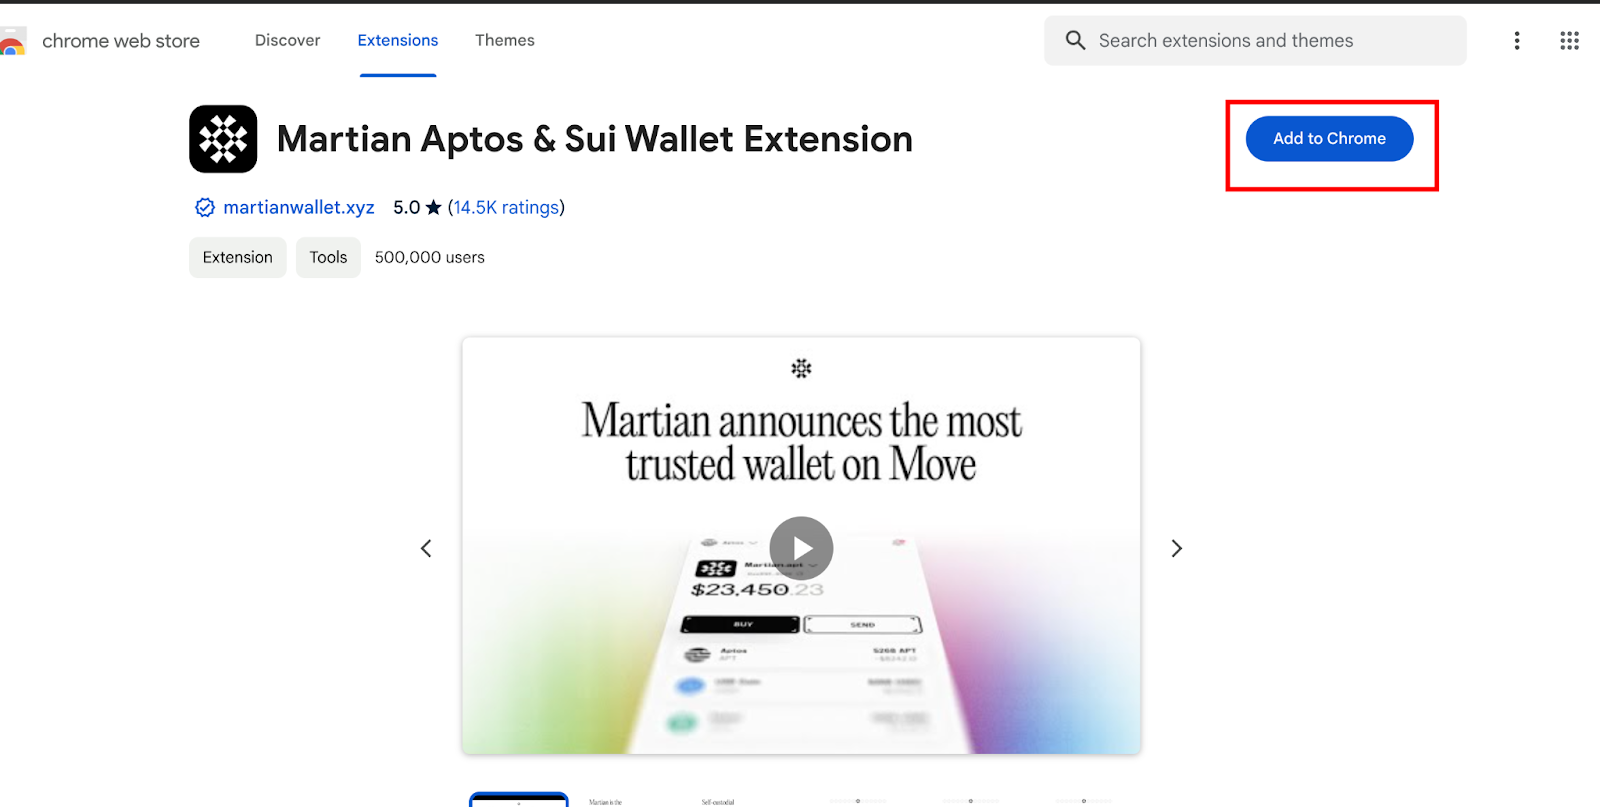
Navigate to the Martian Wallet Chrome extension
Click on the Add to Chrome button.
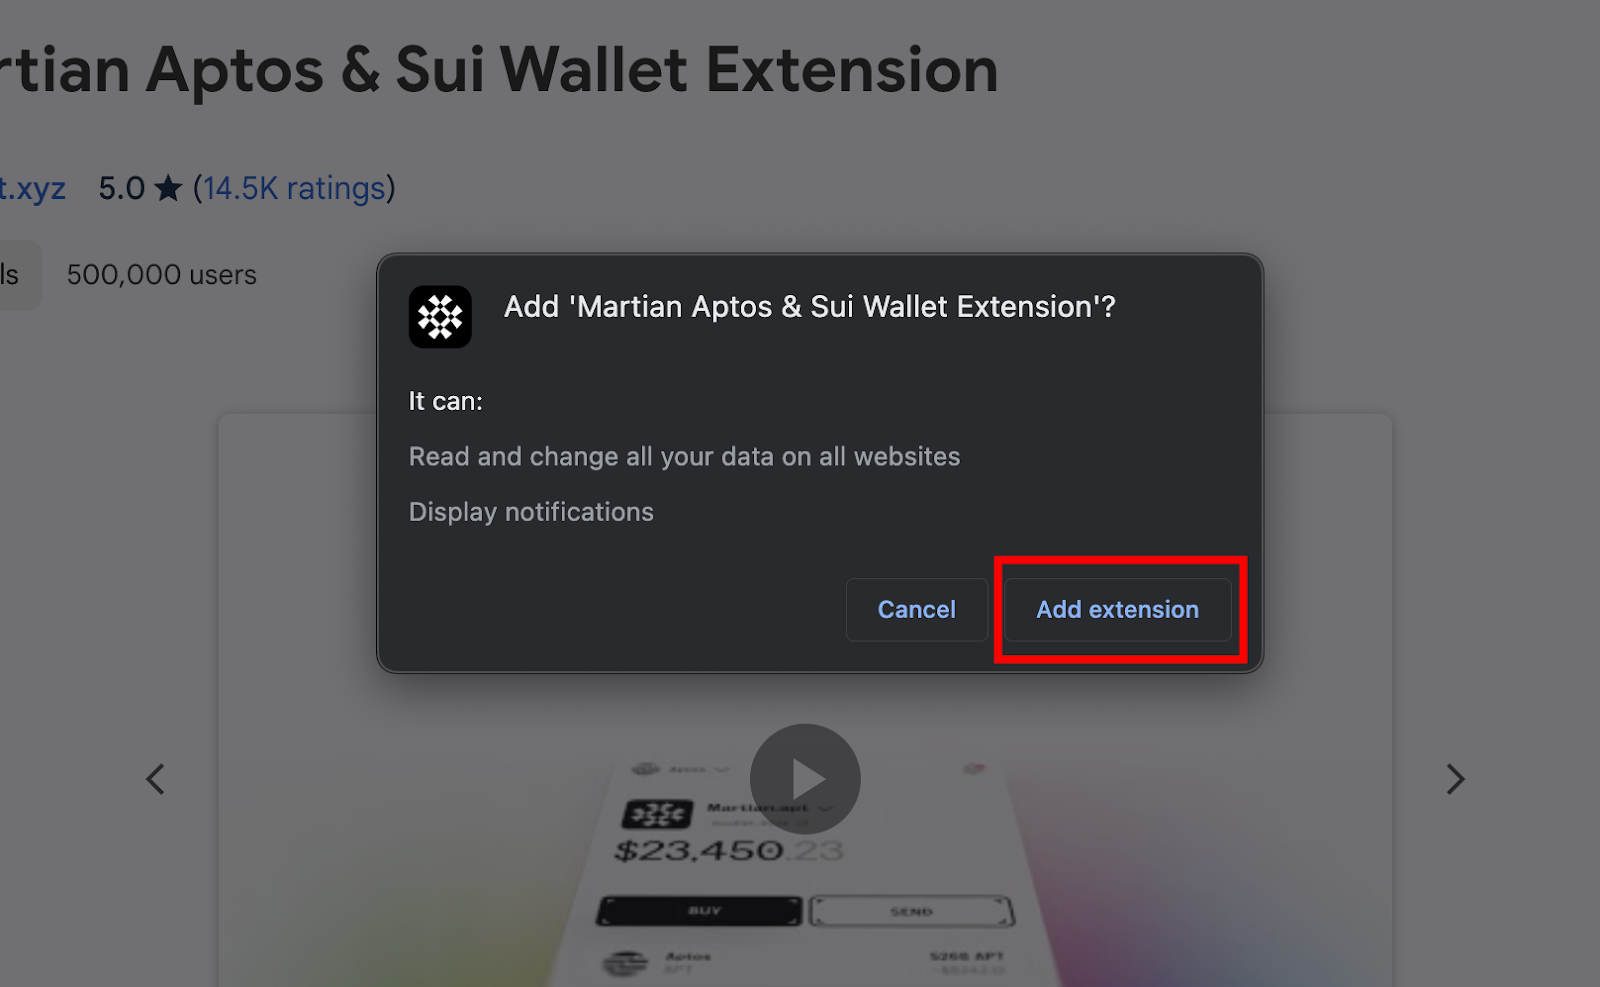
- A modal will pop up, click on the Add extension button and wait for the extension to get added to your Chrome.
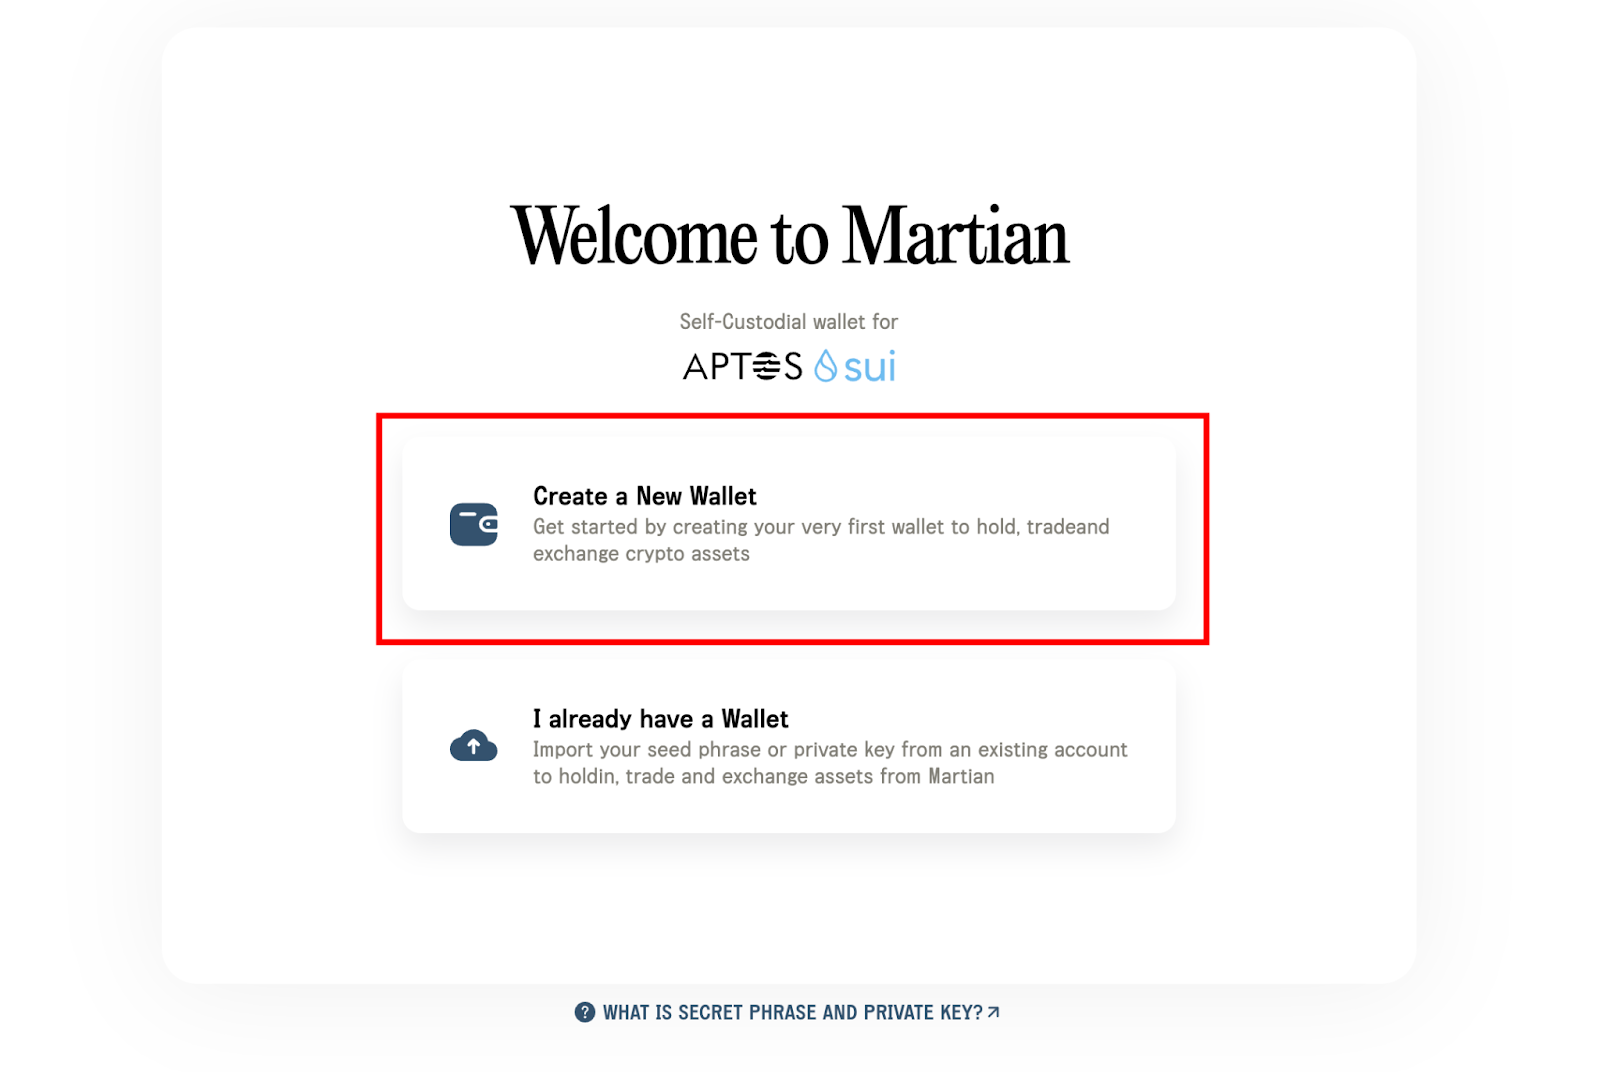
After adding the Martian Wallet extension, you will be redirected to a page where you will either create a new wallet or import a wallet if you already have an existing Aptos wallet.
I assume this is your first Aptos wallet, click on Create a New Wallet
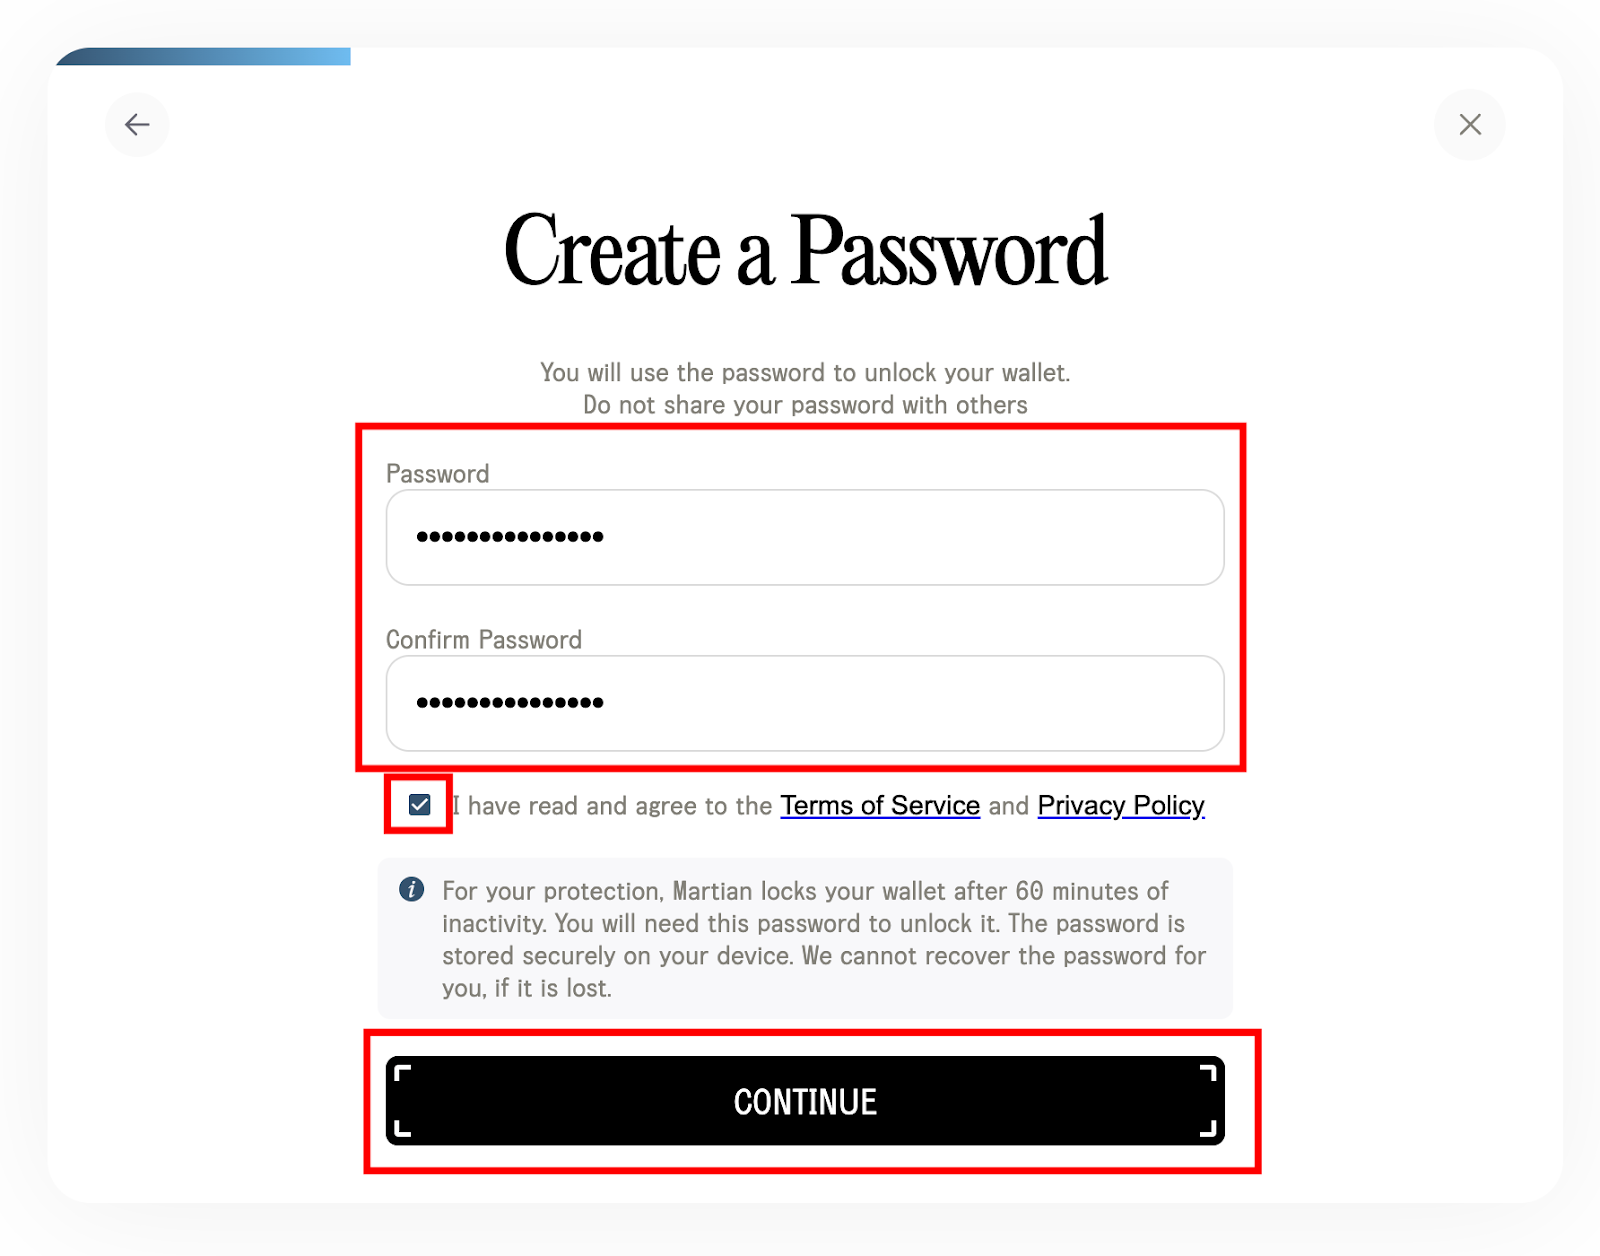
- Create a Password for your wallet, check the Terms of Service agreement checkbox, and click the Continue button
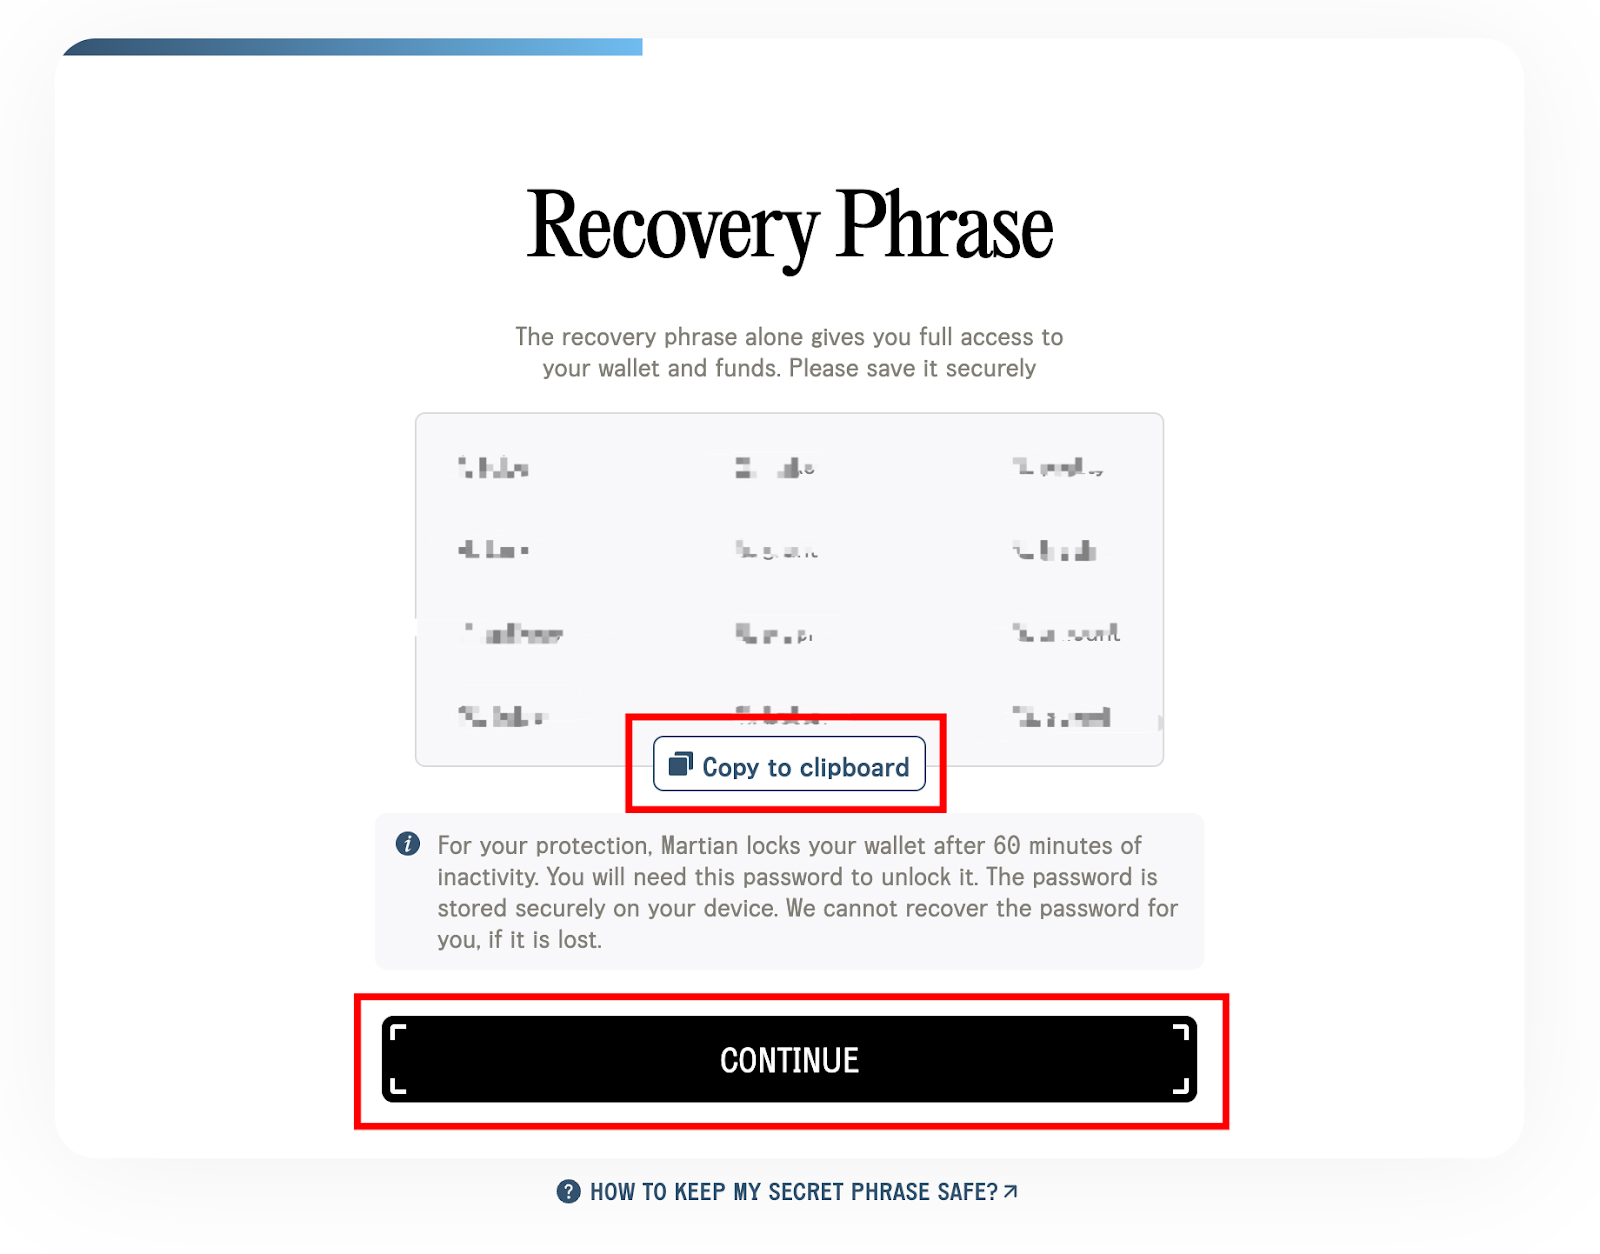
After clicking on the Continue button, you will see a page containing your Recovery Phrase, click the Copy to Clipboard button and securely save your recovery phrase somewhere private. You can write it down in a private notebook.
Click the Continue button to proceed.
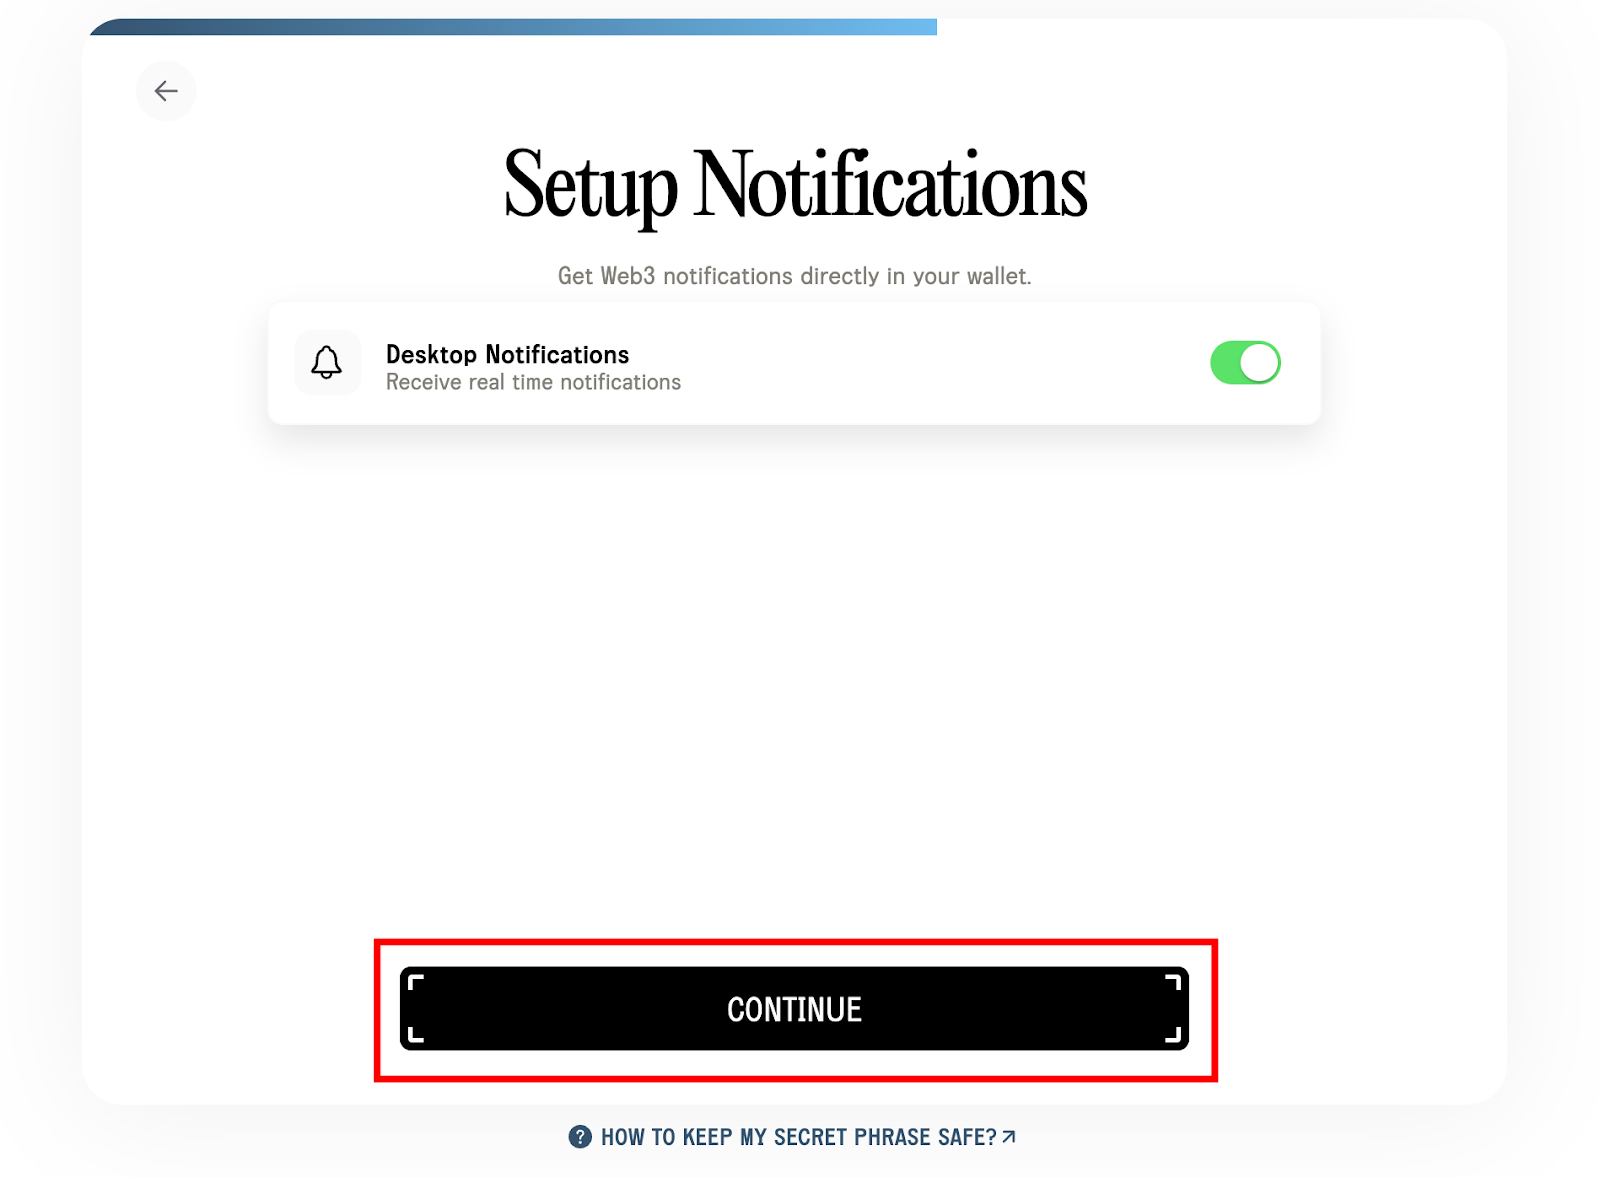
- In the next two pages, click continue.
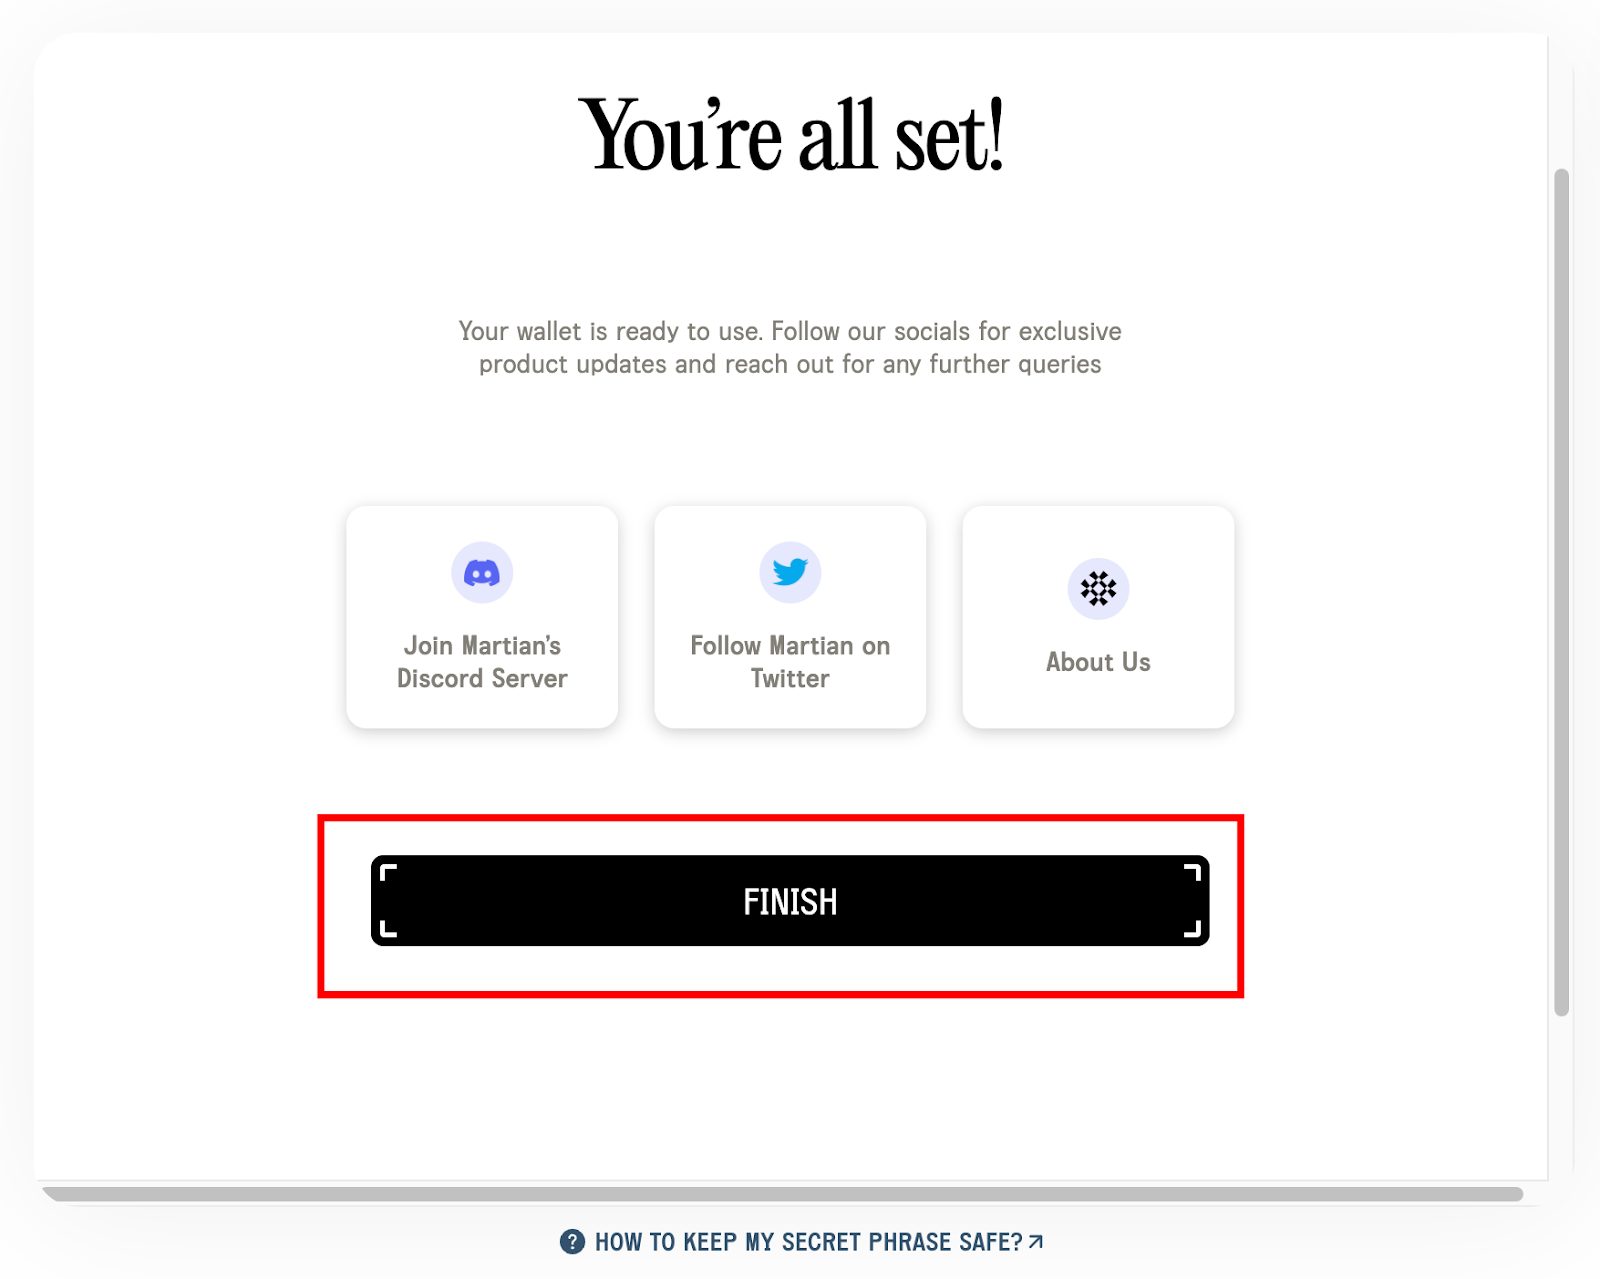
- After this page, you will get to the last page that has the Finish button, click on the Finish button.
- Now that your wallet is completely set, let’s pin it on your Chrome extension. On your Chrome, click on the Extensions icon, and click the pin icon beside Martian Aptos & Sui Wallet
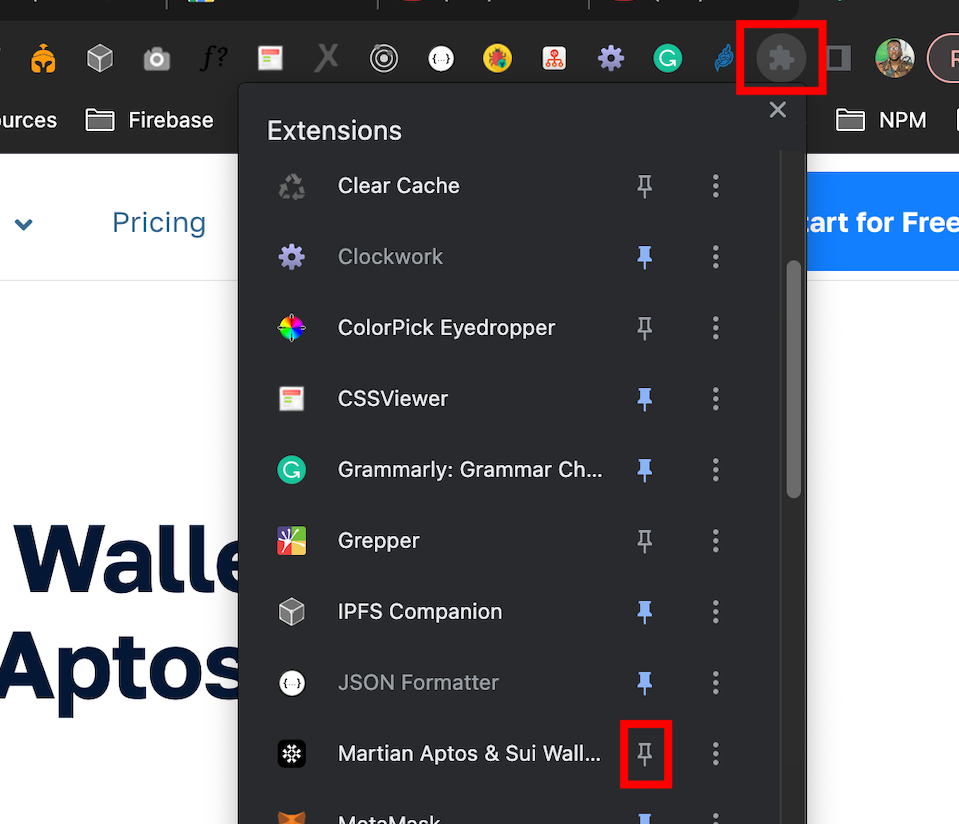
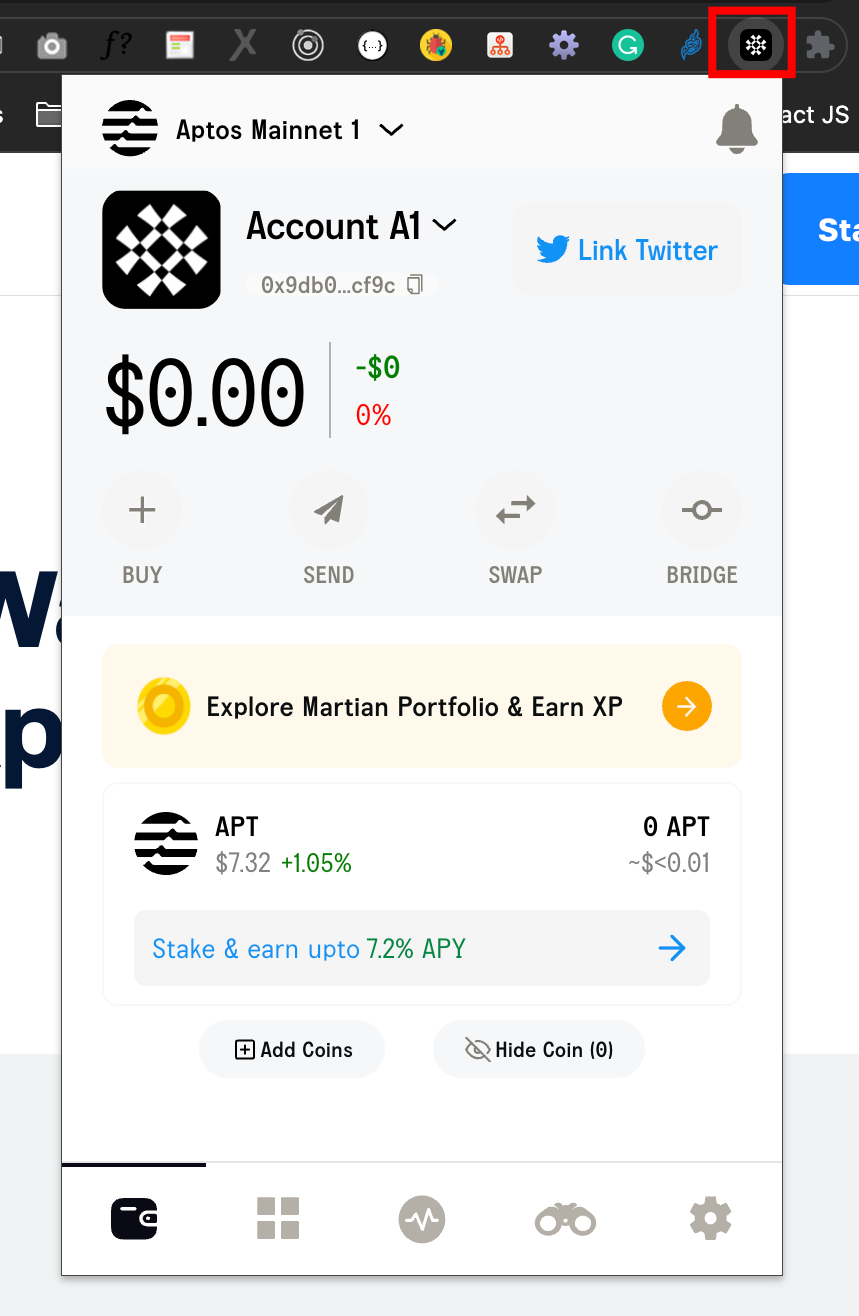
- Your wallet will appear on the extension bar and you can now log into your wallet.
Installing Aptos CLI (Command Line Interface)
The Aptos CLI is a command line interface tool used to interact with the Aptos blockchain. It is used to scaffold a Move project which comes with a well-arranged project structure and is also used to create accounts and private keys for deploying smart contracts on the Aptos blockchain.
Aptos CLI can be installed using Homebrew for MacOS or using scripts for Linux and Windows users. We will be installing Aptos CLI using Homebrew on a MacOS. Linux and Windows users can follow the instructions on this link
Let’s get started with installing the Aptos CLI on MacOS using the following simple steps:
Ensure you have brew installed or navigate to https://brew.sh/ to install homebrew.
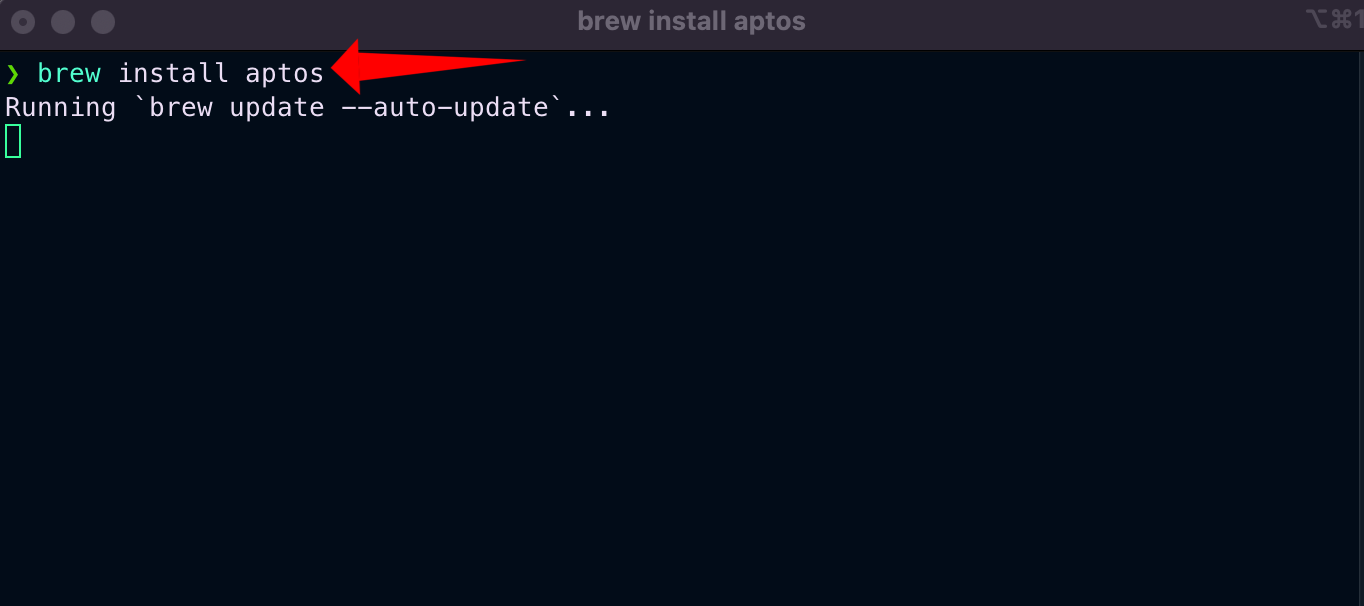
After installing brew, run
brew update.You can now install Aptos CLI using the command
brew install aptos
- Wait for the installation to complete after which you run
aptos helpto display all the Aptos CLI commands.
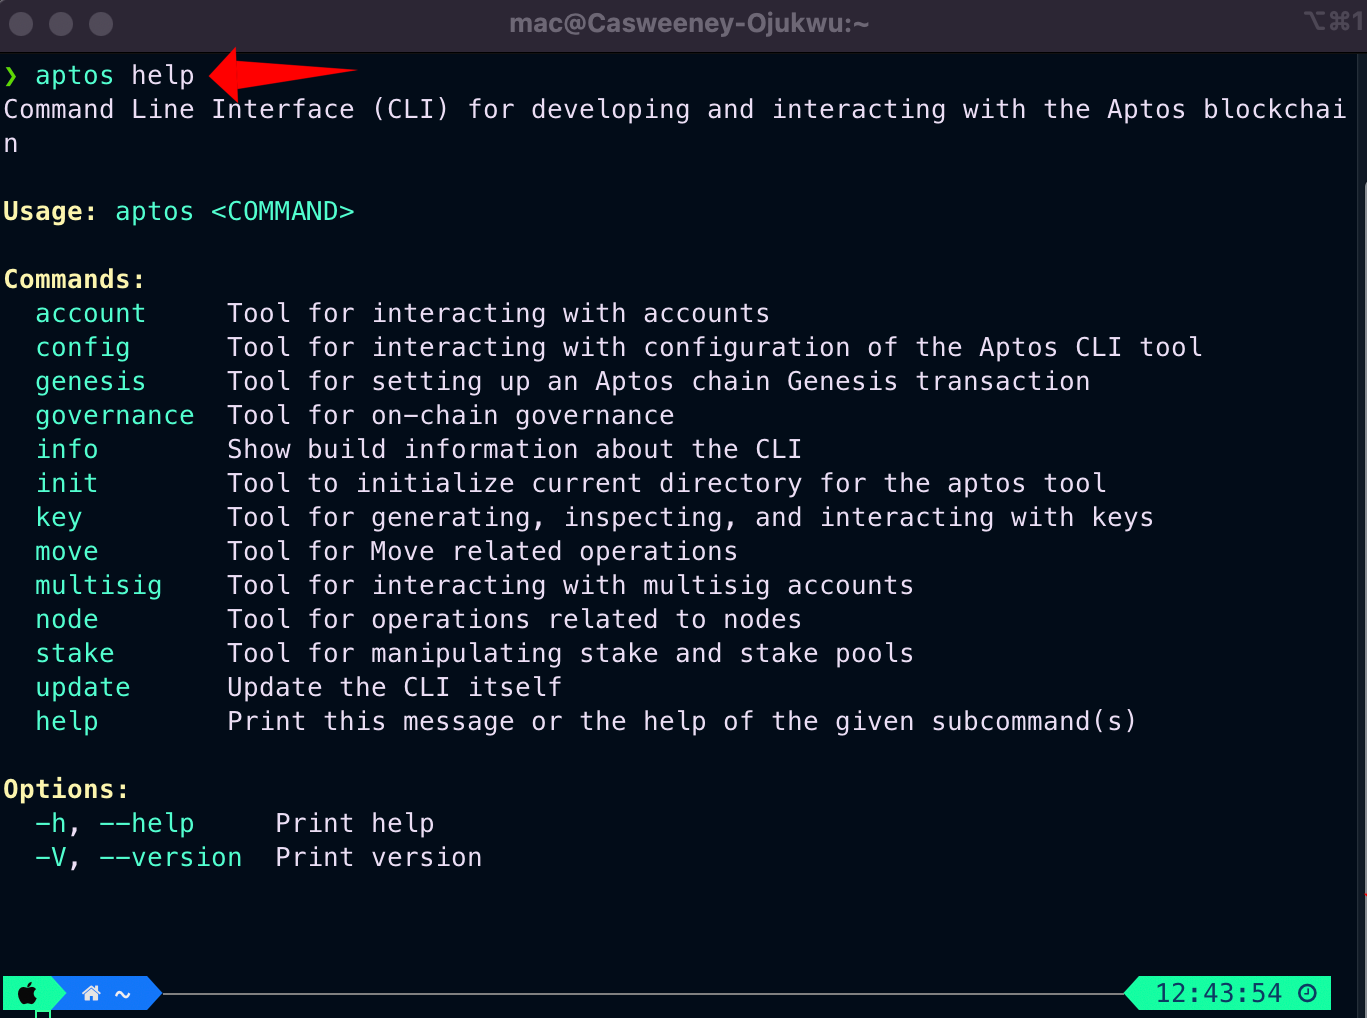
Kudos, you now have Aptos CLI installed on your device.
Installing and Setting up VSCode
Visual Studio Code is a free text editor used for software development. It will be needed to write Move codes. Click on this link to download and install Visual Studio Code.
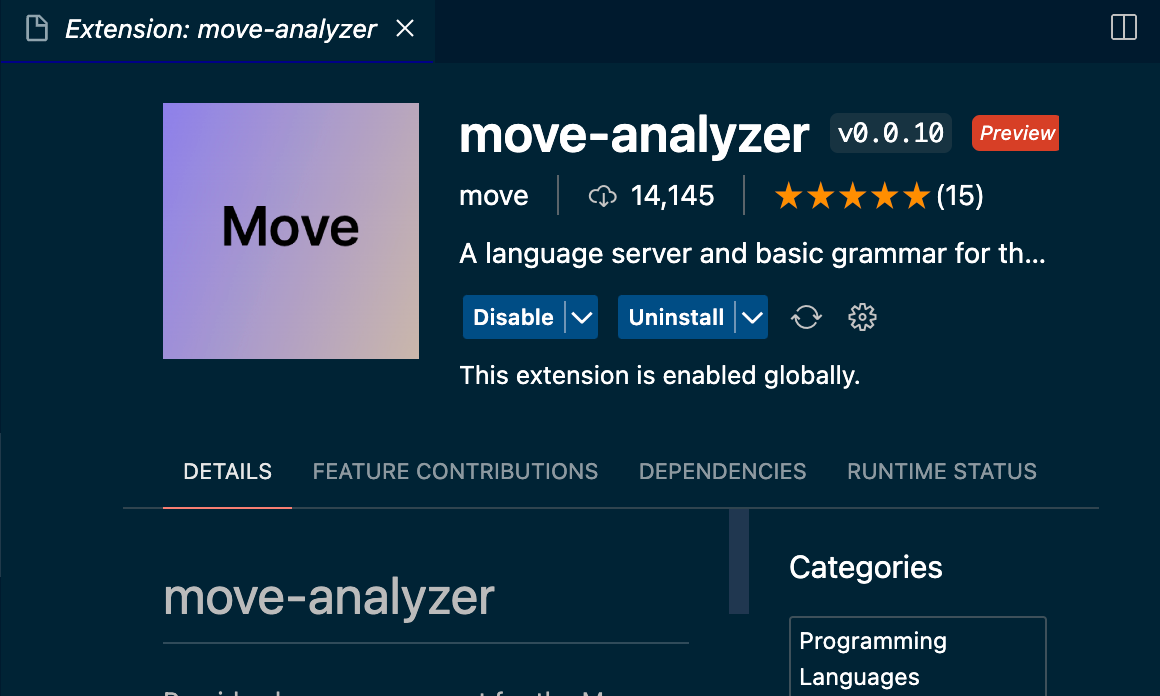
After installing VSCode, you will need to install a VSCode extension called move-analyzer.
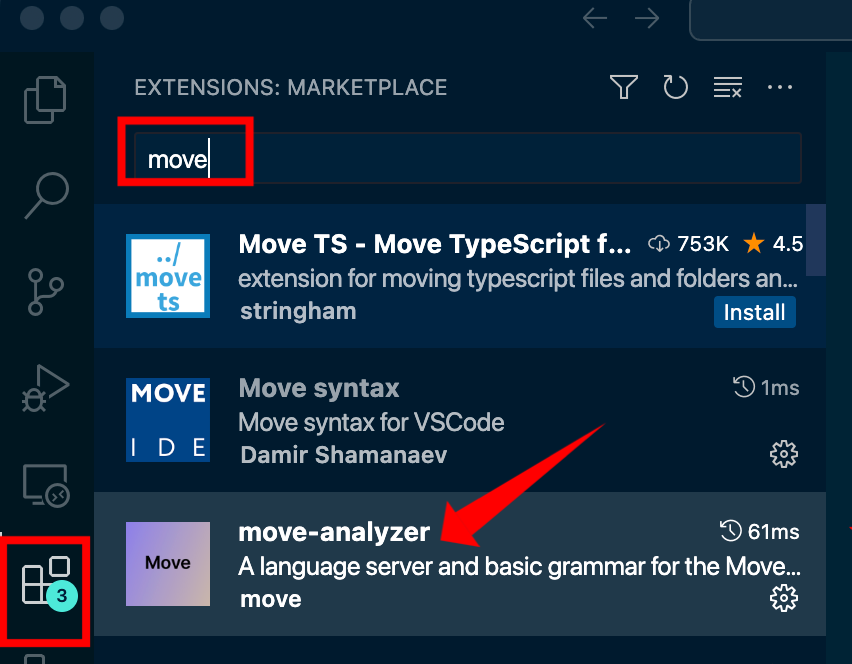
Open the VSCode application you have installed and click on the Extensions tab.
In the search bar, type move. You will see the move-analyzer extension, click on it and click on the Install button.
After installing the move-analyzer extension, you should see something like the image below:
All the required tools for building the Aptos blockchain have been installed, let’s now create an Aptos project to write a smart contract using Move.
Creating an Aptos Project for Move Smart Contract
Let’s scaffold an Aptos project for writing Move smart contracts. We will do this using the following simple steps:
Create a folder called hello-contract
Open your terminal on the hello-contract folder
In the terminal run the command
aptos move init --name hello_contract

- The above command will create an Aptos project for the Move smart contract. Open the hello-contract folder on VSCode and your project structure should look like the image below:
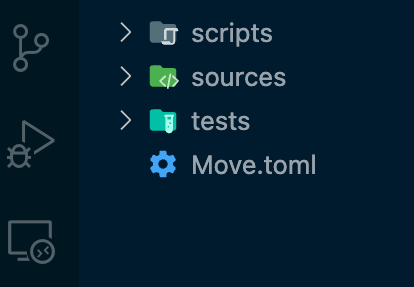
In the above image, the sources directory will contain all the Move smart contracts (modules) we will be writing. The Move.toml file is a manifest that contains metadata such as the name of the project, version, and project dependencies.
The name property in the Move.toml file is the same as the value of the name flag (--name hello_contract) when scaffolding an Aptos Move project.
We have successfully created an Aptos Move project using Aptos CLI commands.
Writing and Deploying Smart Contract
In the previous article here, we had already created an Aptos project for writing move smart contracts, let’s now continue from where we stopped by working on the already created project using the following steps.
Note: Smart contracts in the Aptos blockchain are called modules and publishing a module is the same thing as deploying a smart contract.
Step 1: Create an Account
When deploying a smart contract on the Aptos blockchain, an account and its private key are needed. The smart contract is deployed to the account.
Open the hello-contract project with your VSCode
In your VSCode terminal run the command
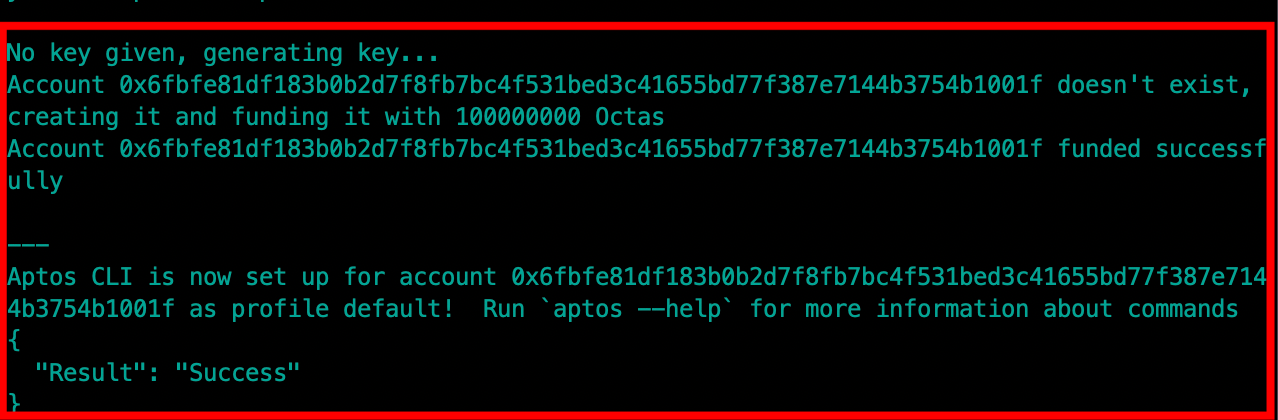
aptos initPress enter when you see a prompt to choose network to automatically select devnet, which is the default network

- Press enter again when you see a prompt to enter a private key. This will generate a random account and a private key for you where the smart contract will be deployed. You can substitute your address and private key as needed.
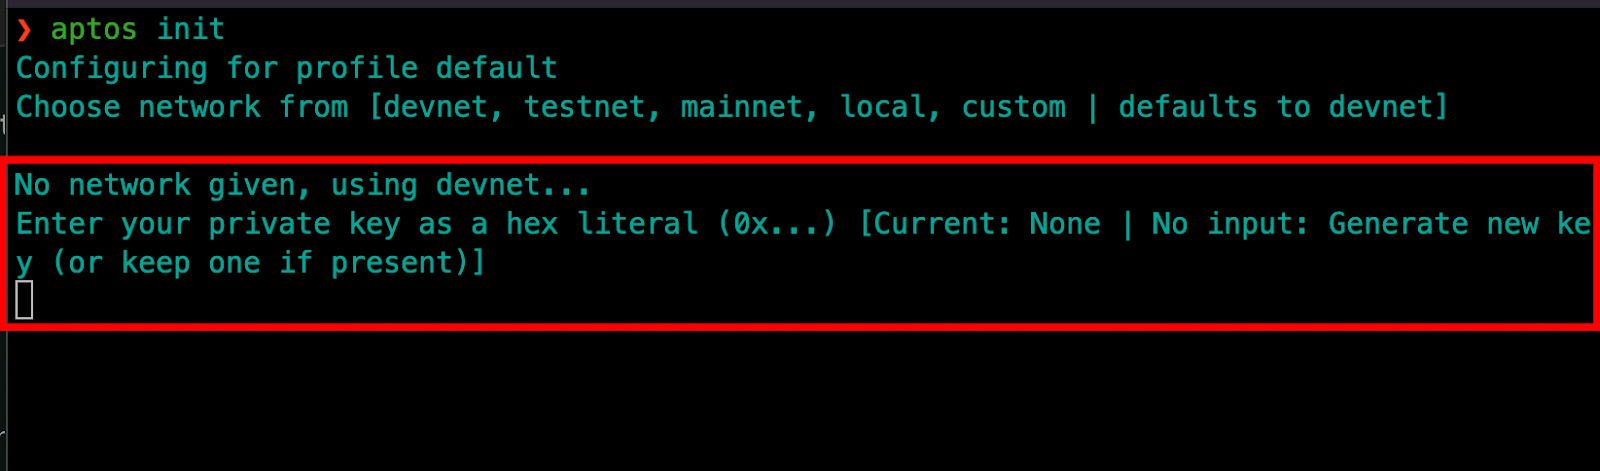
- After pressing enter, if the command is successful, you will see the following in your terminal
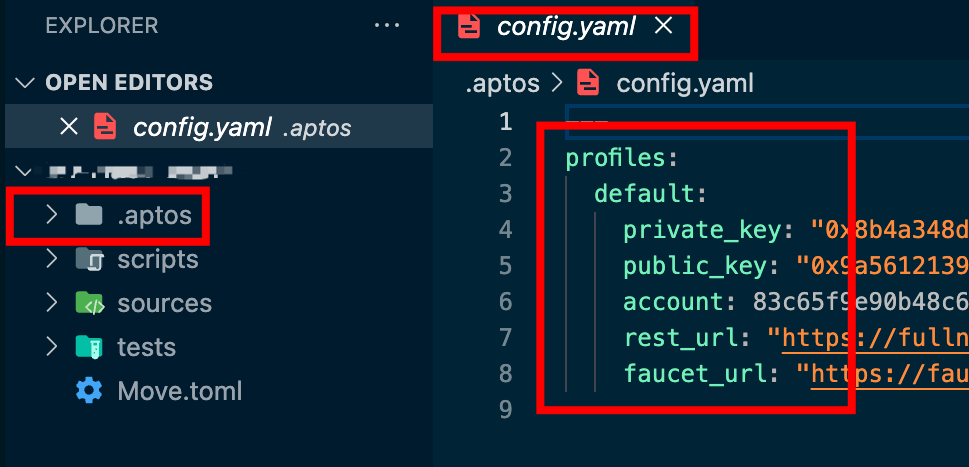
You should see a new .aptos folder in your project which contains config.yaml
The config.yaml file contains the private key, public key, and address of the account that was created using the
aptos initcommand.
Step 2: Write the Smart Contract
- Now that the account is created, create two files in the sources folder. Name one of the files hello_contract.move and the other is hello_contract_test.move.

Copy the code from this GitHub link and paste it inside the hello_contract.move file.
Also, copy the code from this link and paste it inside the hello_contract_test.move file.
Step 3: Compile and test the Smart contract (module)
- Once you have the codes in the files you created, let’s now compile the smart contract using the following command to compile the hello_contract.move contract (module)
aptos move compile --named-addresses hello_contract=default
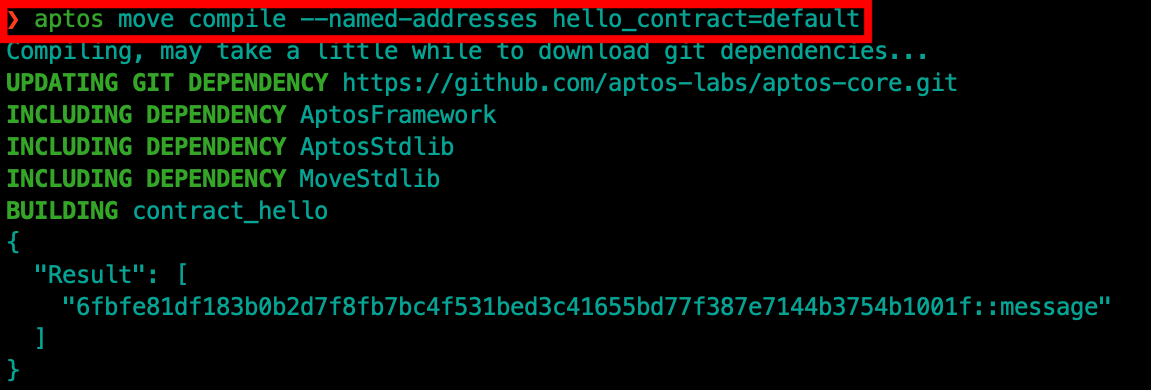
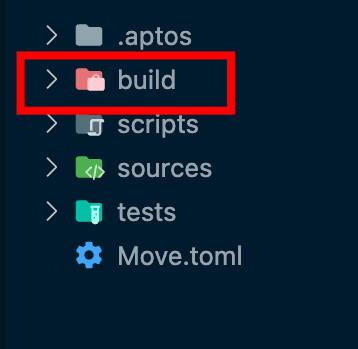
- After compiling you will notice a new build folder has been added to the project
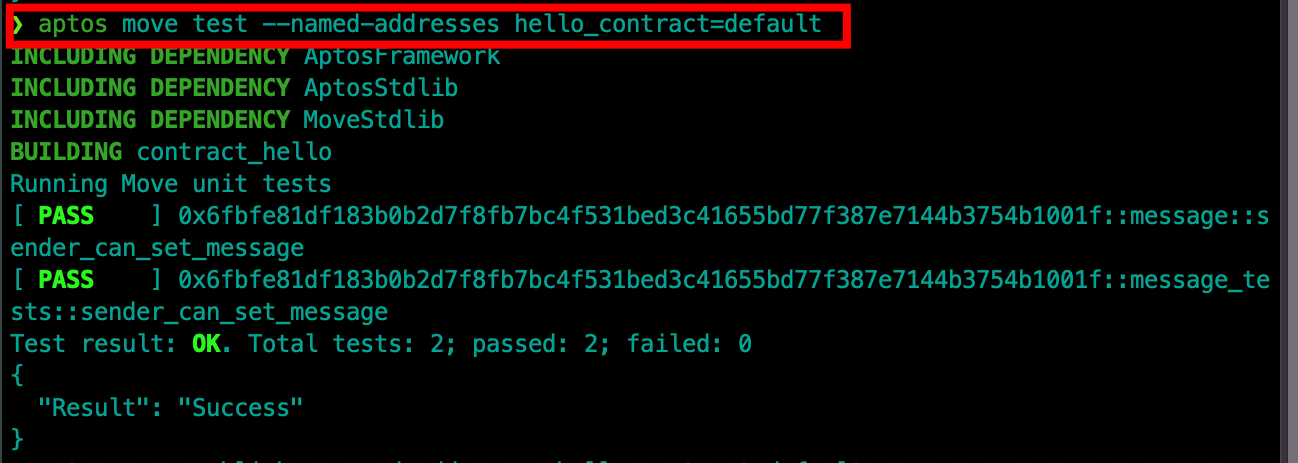
- Run the following command to run the test
aptos move test --named-addresses hello_contract=default
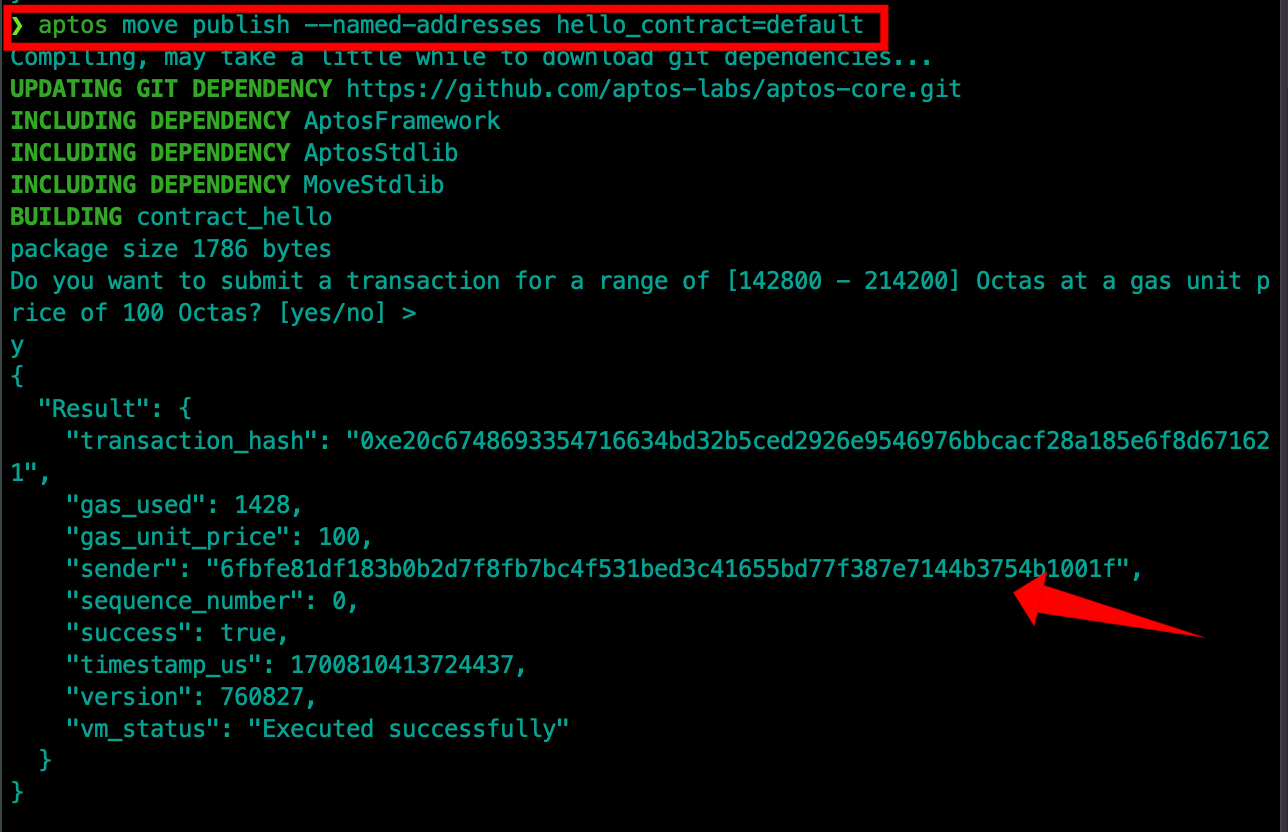
Step 3: Publish/Deploy the Move contract on the Aptos blockchain
After compiling and testing the smart contract, we need to deploy it to the Aptos blockchain. To do this, run the following command:
aptos move publish —named-addresses hello_contract=default
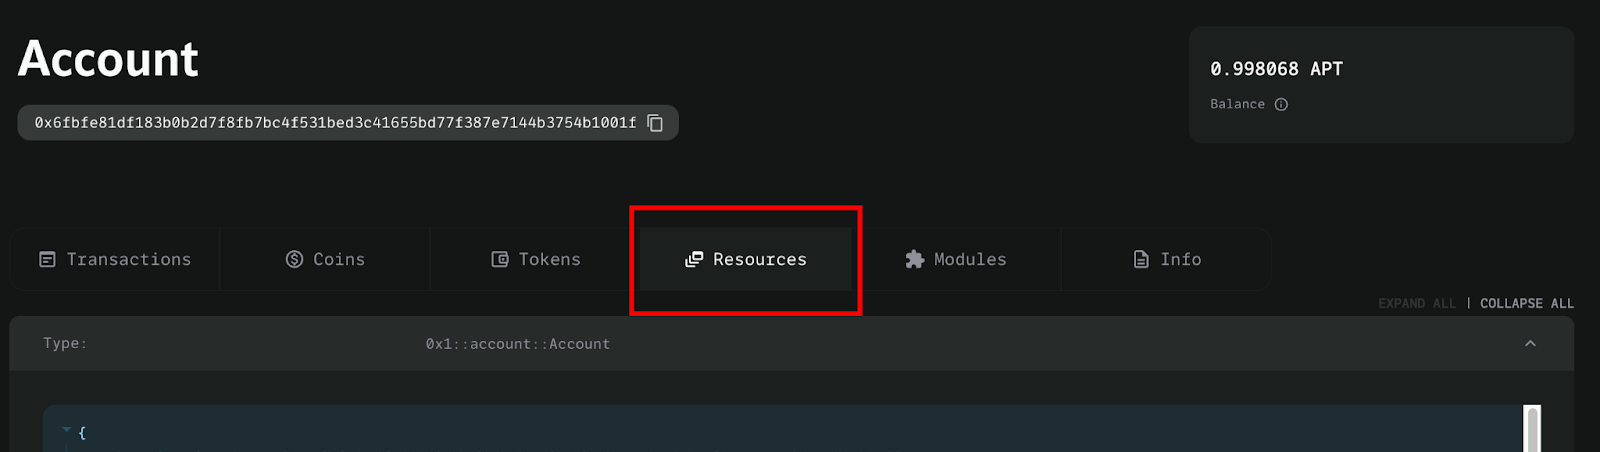
After deploying the move smart contract on the Aptos blockchain, navigate to the Aptos Explorer
Make sure you are on Devnet, copy the address of the sender as shown in your terminal, see the screenshot above for reference, and paste the address you copied into the Explorer search bar.
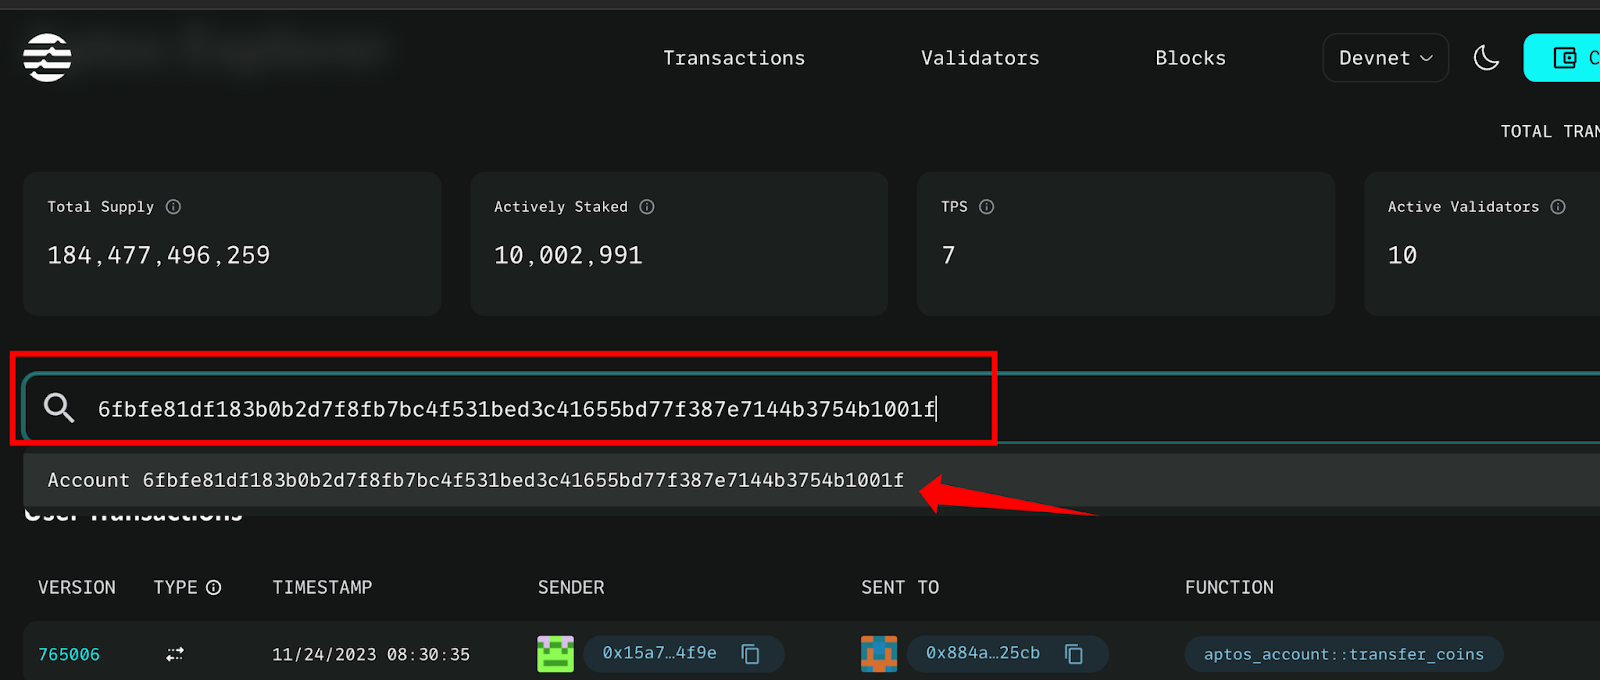
Click on the Account result from the search, it will take you to another page
Click on the Modules tab, you should the your smart contract code and the ABI
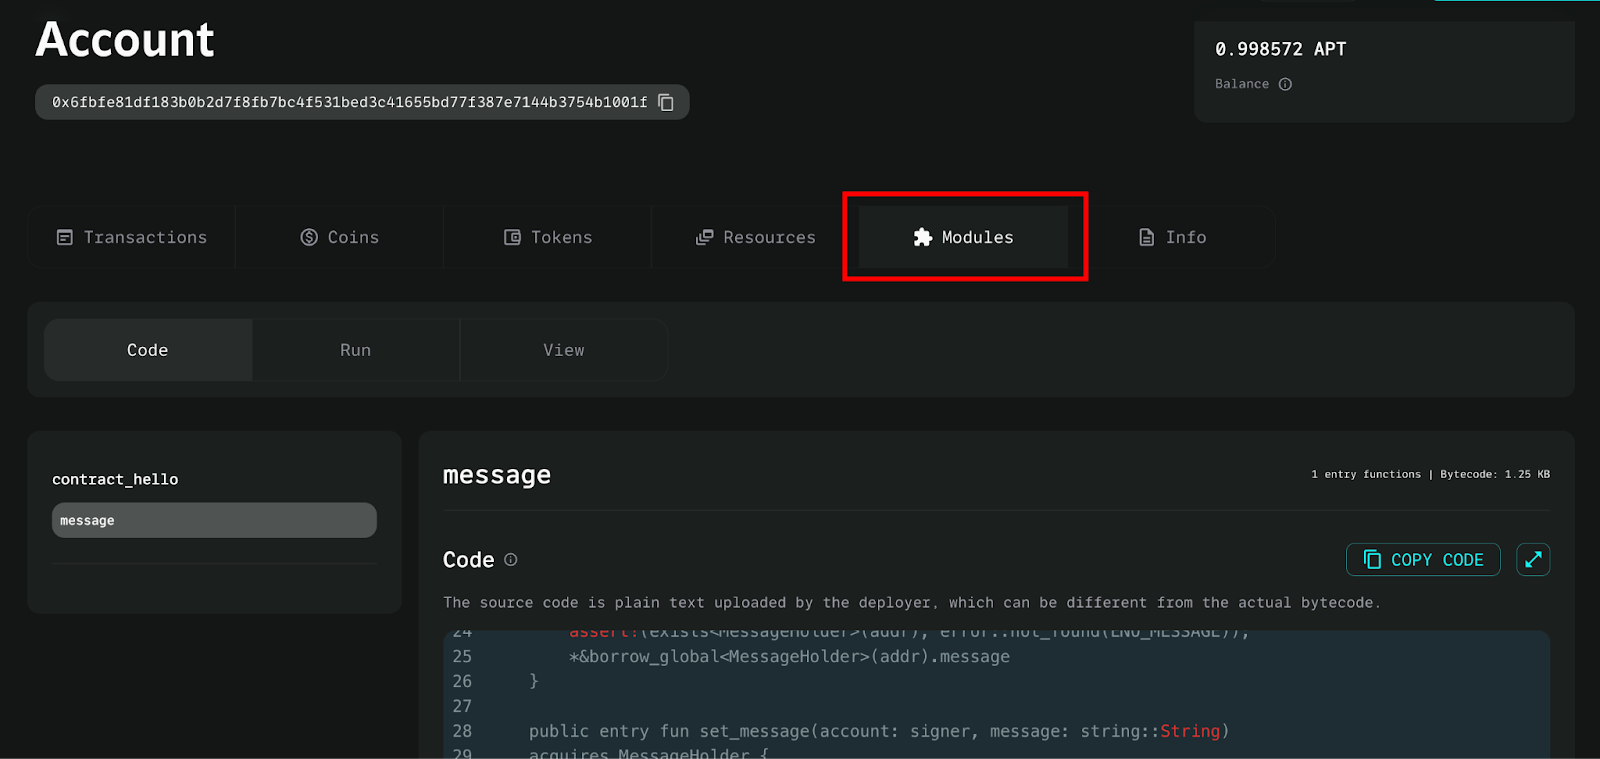
We have successfully deployed our Move smart contract on the Aptos blockchain.
Interacting with Deployed Smart Contract using Aptos CLI
We will be using the Aptos CLI command to interact with the smart contract we have deployed by calling the functions in the smart contract.
We have created a simple smart contract that saves a message (string) on the blockchain. We will be calling a function named set_message, passing the appropriate arguments to set the message on the blockchain storage.
To interact with the smart contract we have deployed, run the following command
aptos move run --assume-yes \

  --function-id 'default::message::set_message' \

  --args 'string:Hello! My name is Casweeney’

Go back to Aptos Explorer click on the Resources tab, and scroll to the MessageHolder card. You should see the message value we passed during the interaction as the message on the explorer.
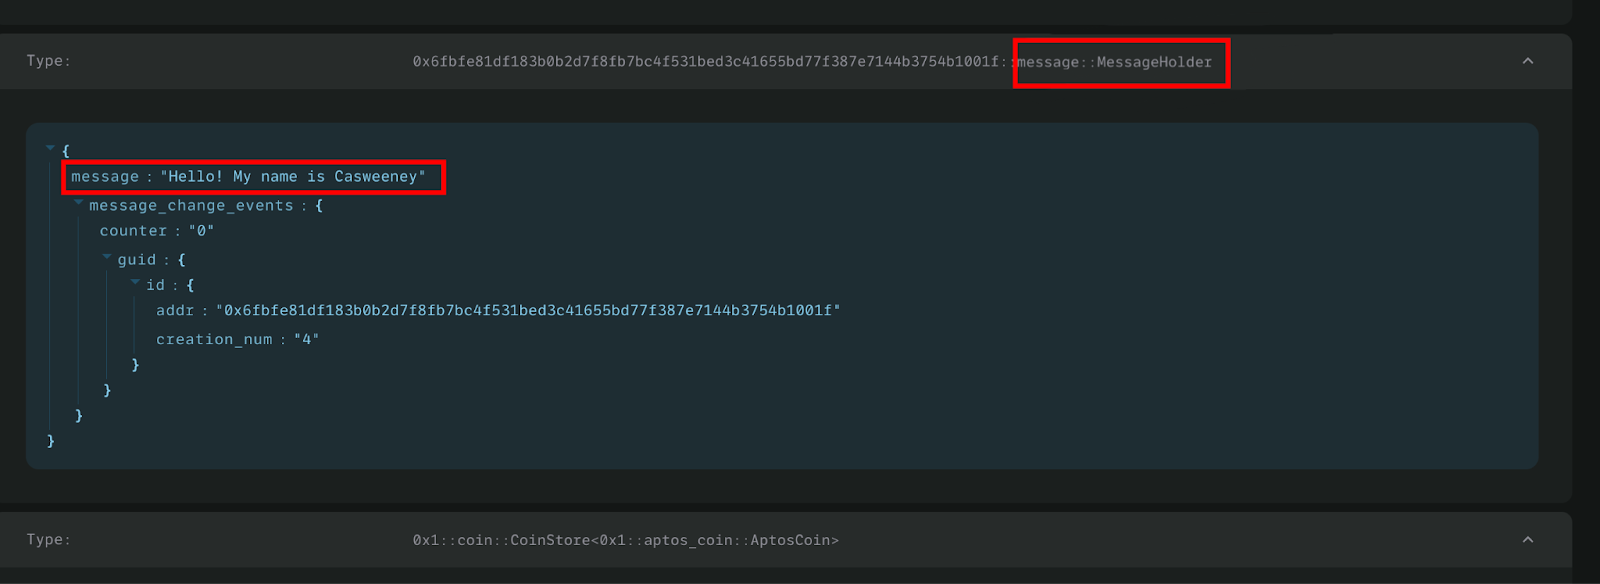
You can run the interaction script again with a different message, and check the explorer again. You will notice that the message on the explorer will change.
aptos move run --assume-yes \

  --function-id 'default::message::set_message' \

  --args 'string:This is the second message’
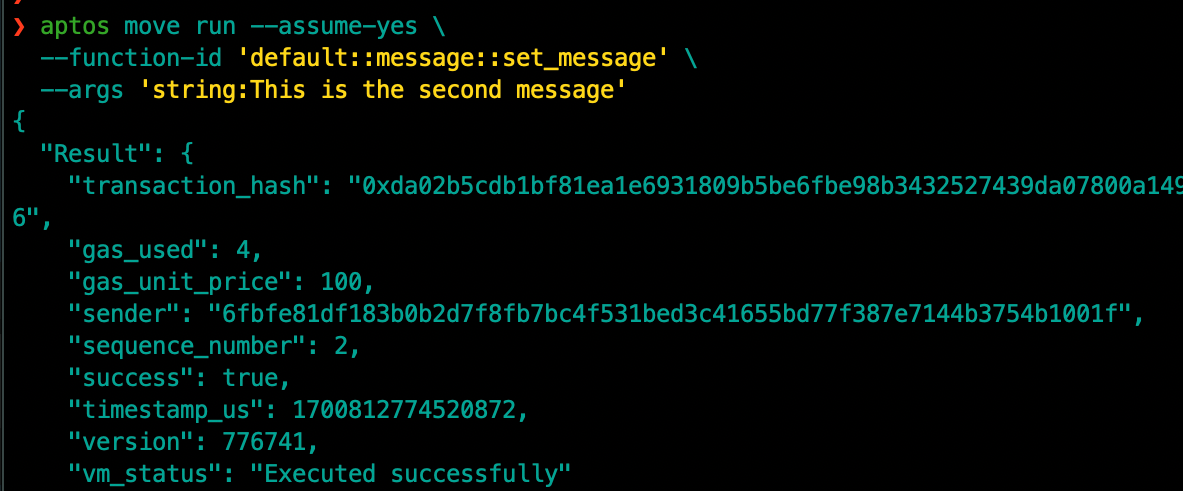
Check the explorer again.

Smart Contract Codes Explanation
Let’s now explain the logic that makes up the hello_contract smart contract/module. The smart contract is written with the Move programming language.
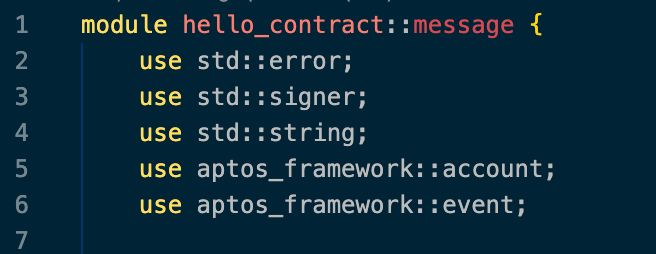
This code defines a module named hello_contract::message on line 1 with various functions and structures for handling a simple messaging system on the Aptos blockchain.
Lines 2 - 6 are import statements in the Move programming language. Each of the import statements imports a module or some functionalities from a standard library or framework that is needed in the smart contract.
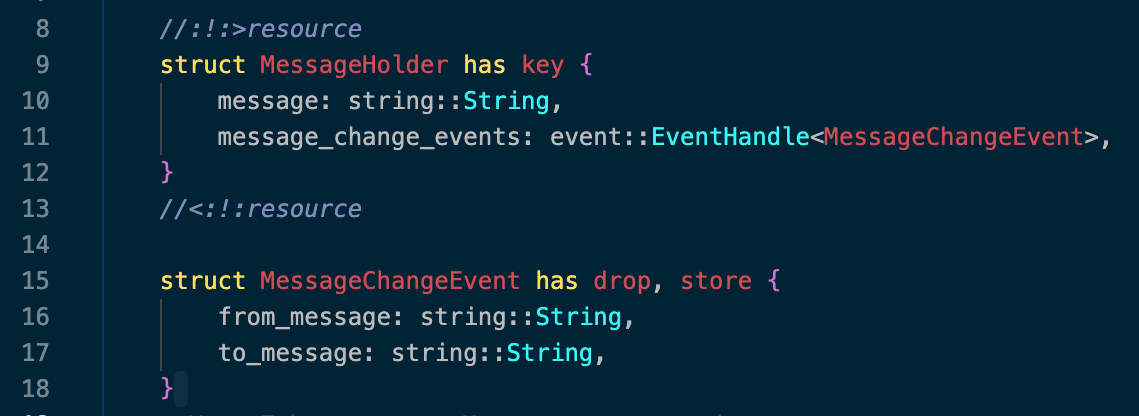
Line 9 - 12 is a struct named MessageHolder. This is a resource type and is signified by the has key keyword. It contains two fields which are: message for storing string messages, and message_change_events which is used to track changes in the message field.
Line 15 - 18 is another struct named MessageChangeEvent. This is an event type that logs the changes in the message. It keeps track of the old and new messages.
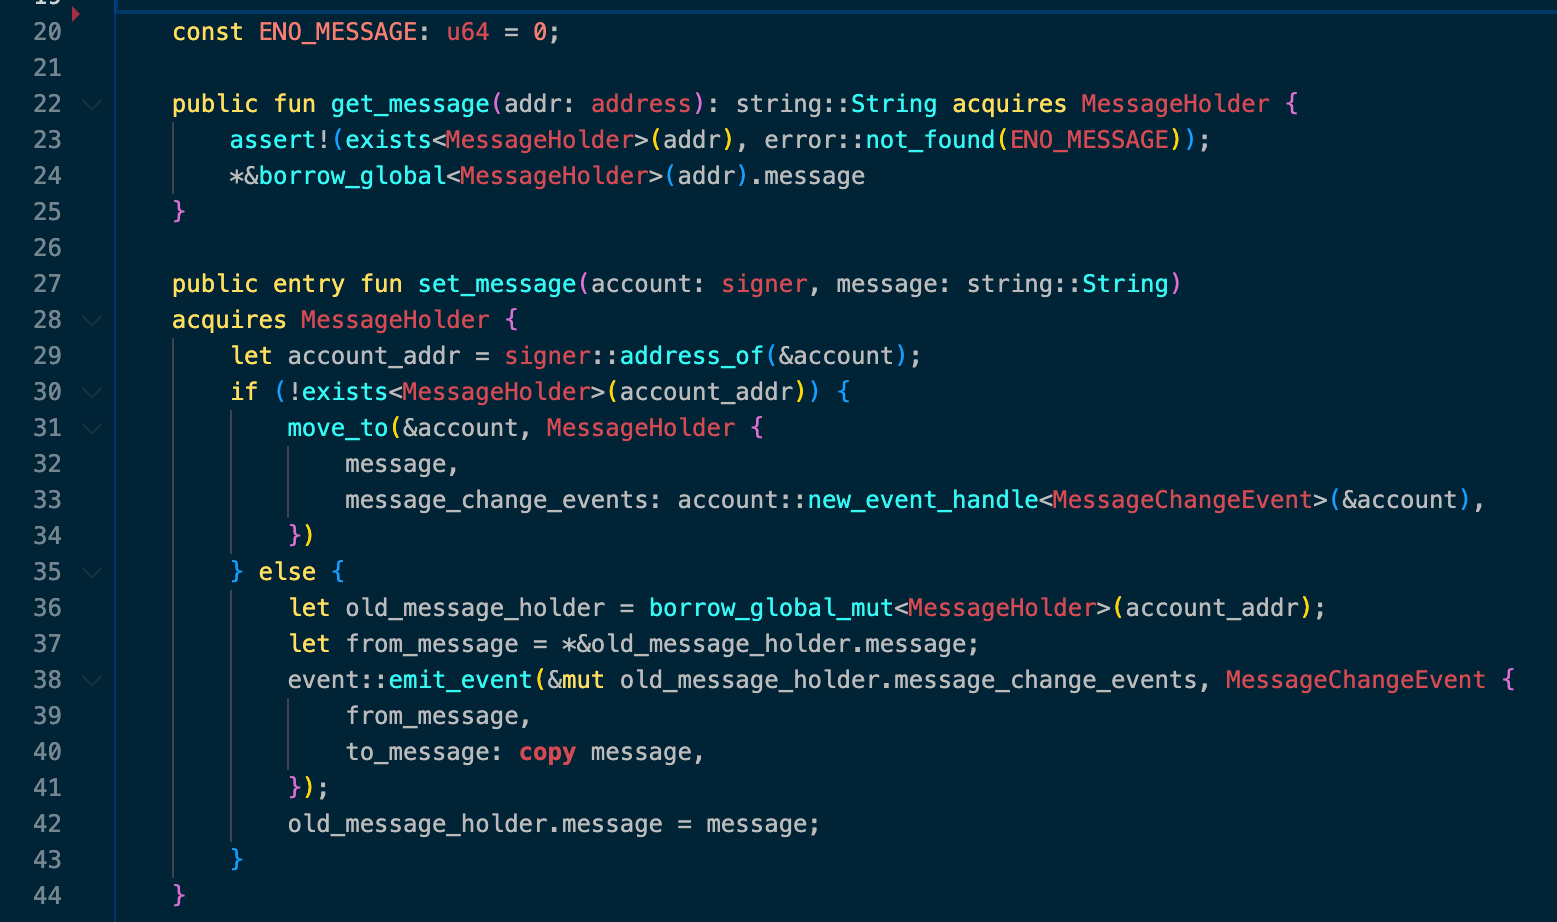
On line 20, is a constant ENO_MESSAGE. This is an error code used to handle cases where there is no message.
Line 22 - 25 is the get_message function. This is a public function that retrieves the message from a given address. It ensures that a MessageHolder exists at the specified address and then it borrows the message.
Line 27 - 44 is a public entry function called set_message that allows a signer to set or update a message. It creates a new MessageHolder if it doesn’t exist or updates the existing one after which it emits a MessageChangeEvent.
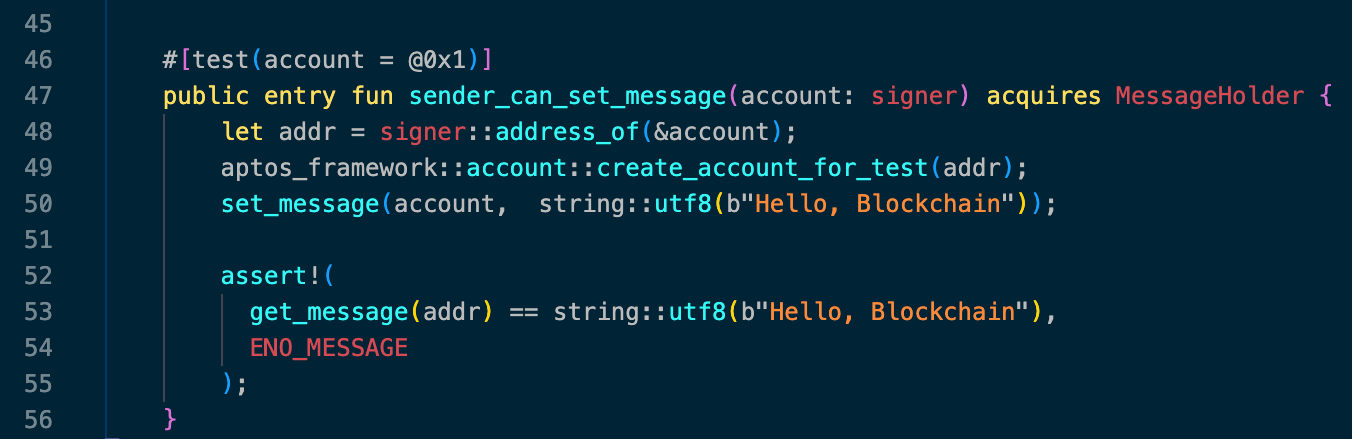
Line 46 - 56 is a test function called sender_can_set_message which is annotated with #[test] attribute. It creates a new account, sets a message, and asserts that the message is retrieved as expected.
Congratulations! You have successfully written and deployed a smart contract using the Move programming language on the Aptos blockchain.
Previous Article: Unleashing the Power of Aptos Blockchain and Move Programming Language


